An old door can reveal its history through a hinge: worn knuckles, hand-cut screws, and darkened iron all leave clues. The right replacement should support the door without making the restoration feel newly manufactured. That balance takes care.
Architectural critic and preservation advocate John Ruskin offered a useful reminder: “Take proper care of your monuments, and you will not need to restore them.” His words fit Antique Door Hinges especially well. Preserve sound originals when practical, and choose replacements that suit the door’s age, weight, and style. A heavy oak door may need robust butt hinges; a narrow cupboard door may call for smaller, simpler hardware. Measure the existing mortises and hinge spacing before ordering. Tiny differences matter.
This guide explores seven popular options for restoration projects, from classic butt and strap hinges to decorative HL and parliament styles. It also considers materials, finishes, bearing types, and how each hinge changes a door’s movement and appearance. Look closely at the screw holes. Check for sag. Even an attractive hinge can disappoint if its pin binds or its leaves sit proud of the wood. Antique finishes vary, and reproductions do not always match surviving hardware perfectly. That is worth admitting. The best choice is not automatically the oldest-looking one; it is the hinge that works reliably while respecting the door’s character.
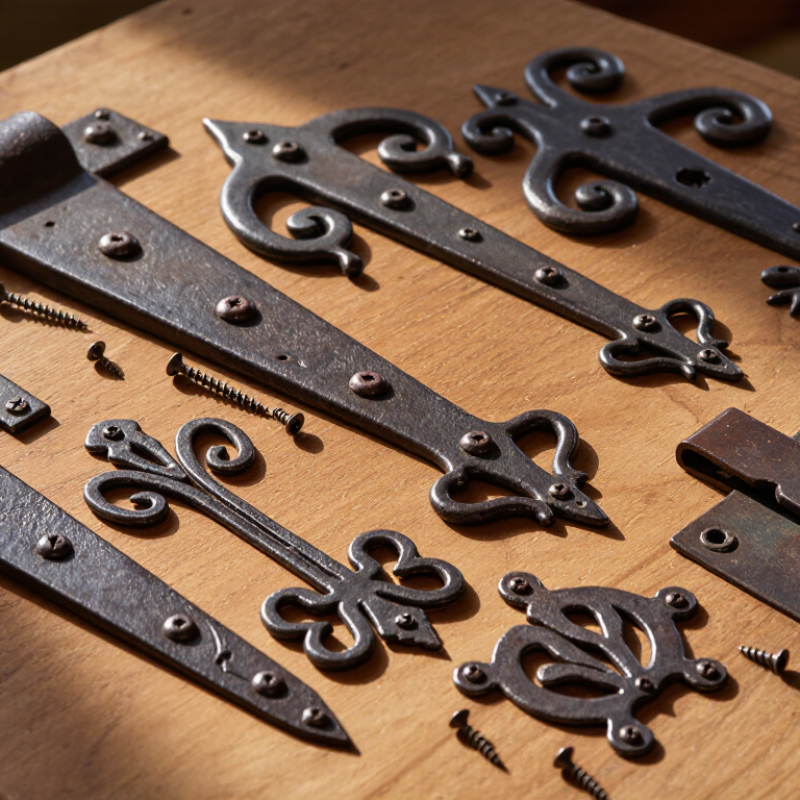
Antique door hinges are working parts, not merely decorative details. Their form can reveal how a door was made and used. Butt hinges sit in recessed mortises, while strap hinges extend visibly across the door face. Pintle hinges, with a projecting pin, are often found on gates or doors built to swing from fixed supports. These differences affect how weight is carried and how the door moves.
Look closely before removing anything. Measure each leaf, note the pin diameter, and photograph the hinge in place. Check for worn knuckles, loose screws, bent leaves, and uneven gaps around the door. Old finishes and tool marks may offer useful clues, but they do not prove a hinge’s age on their own. Small clues matter.
For a sound restoration, replacement hardware should match the original hinge’s dimensions and load requirements, not just its appearance. A slightly different hinge can shift the door, scrape the floor, or strain the frame. Test movement gently before tightening every screw. Some doors have been altered over decades, so the existing holes may not tell the whole story. That uncertainty is easy to overlook. Preserve usable original hinges when practical, and consult a qualified restorer if the door is heavy, valuable, or unstable.
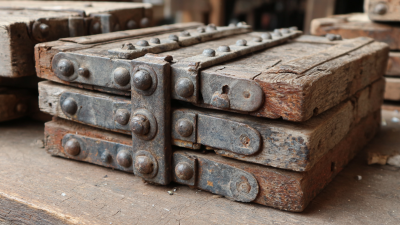
Antique door hinges can add character, but age alone does not make one suitable for restoration. Look for hand-filed edges, uneven surfaces, and wear around the knuckles. These clues may suggest older manufacture, but later repairs can imitate them. Patina can mislead. Check for active rust, cracks, loose pins, and metal loss before reuse. Wrought iron, cast iron, and brass age differently, so color alone is not a reliable guide.
Compatibility matters just as much as appearance. Measure each hinge leaf, its thickness, and the distance between screw holes. Compare these measurements with the existing mortise and door edge. Count the knuckles, and check whether the pin can be removed in the direction needed for your door. A heavy door may need larger, sound hinges; worn screw holes or a bent leaf can cause sagging. I have found that old doors are rarely perfectly square, so test the fit before drilling or trimming anything.
Tips: Photograph the hinge in place, record measurements, and keep matching pairs together. If the metal feels brittle or the pin binds, pause and ask a qualified restorer to assess it. A slightly imperfect match may be safer than forcing a near-fit.
Antique butt hinges suit many paneled doors, with leaves mortised into the door edge and frame. Check the knuckles for wear and the old screw holes for splits. A loose pin can make removal easier when a heavy door needs repair. Small details matter. These hinges are common, but not every old door uses standard dimensions.
Parliament hinges project farther from the frame, letting a door swing clear of deep trim or a narrow opening.
Strap hinges spread their weight across the door face and often suit gates or simple plank doors.
H hinges have a long, visible form that can complement older interior doors.
HL hinges combine an H-shaped upper section with a lower strap-like leaf. Their silhouette is distinctive.
Rising hinges lift a door as it opens, which can help it clear an uneven floor; confirm the swing direction before fitting.
Pivot hinges carry the door on points near its top and bottom, rather than along its edge.
Match the hinge style to the door’s weight, frame, and original screw pattern—not appearance alone. A tiny modern screw can look wrong beside broad, hand-worn leaves. Keep sound original hardware when practical, and test movement before final tightening. Restoration choices are rarely perfect. A replacement may fit, yet still change the way the door feels.
A hinge should carry the door before it tries to decorate it. Weighing a door is not always practical, but its height, thickness, and solid or hollow construction offer useful clues. Heavy oak doors often need wider, thicker hinges and sound fixings; a light cupboard door may need only a modest butt hinge. Check the frame, too. Loose timber can make even a well-sized hinge sag. Measure twice.
The hinge shape can help preserve a period look. Plain butt hinges suit many restrained interior doors, while long strap hinges can complement simple plank doors. H-shaped or HL hinges may suit some earlier styles, but surviving examples nearby are better guides than a date alone. Look at the leaf outline, knuckle size, screw placement, and finish. I have learned that a hinge can look right in a catalogue and still feel wrong against the door.
Test movement before settling on a replacement. A door that binds at the top may need alignment, not a heavier hinge; adding metal can conceal the cause. Match the original mortise where possible, and avoid enlarging it just to fit a convenient size. Small differences matter. On a significant historic door, document the existing hardware and seek a conservation specialist’s advice before altering old timber.
A common rule of thumb is to use two hinges for doors up to 60 inches high, three for doors 60–90 inches high, and four for doors 90–120 inches high. Heavy solid-wood doors may need additional support; check hinge capacity and the door’s condition. Choose the hinge style and finish to suit the door’s period details.
Antique hinges often look sturdy until a door is rehung and the leaves no longer sit flush. Before removal, photograph each hinge and mark its position; older doors may have been adjusted around uneven frames. Support the door’s weight, then remove screws carefully. If a screw resists, forcing it can split the timber or damage its head. Clean dirt with a soft brush and mild soap, testing a hidden area first. The National Park Service’s Preservation Brief 6 warns that abrasive cleaning can harm historic materials. A gentle approach is safer. Sometimes, less cleaning is better.
During installation, check that the hinge knuckles align and the door swings without scraping. Use screws that fit the original holes, and avoid overtightening into aged wood. A thin shim can correct a small alignment problem, but it may not solve a twisted frame. That part is easy to misread. For maintenance, wipe away moisture and inspect pivot points for rust or looseness; apply a small amount of suitable lubricant only where needed. The 2016 NACE IMPACT study estimated corrosion’s global cost at $2.5 trillion, or 3.4% of global GDP. That figure covers many industries, not antique hinges alone, but it shows why regular inspection matters. Keep a simple record of repairs. It helps reveal recurring movement before the door binds again.
| Hinge type | Best suited to | Common historic features | Restoration and installation notes | Maintenance |
|---|---|---|---|---|
| Butt hinge | Interior doors and many traditional hinged doors | Two leaves joined by a pin; leaves are commonly mortised into the door edge and jamb. Older examples may have plain or decorative knuckles. | A practical choice when the original door has mortises. Match leaf size, pin arrangement, and screw-hole locations where possible; repair loose wood before refitting. | Remove dust and check for a loose pin or screws. Apply a small amount of suitable hinge lubricant if the hinge squeaks. |
| Strap hinge | Barn doors, gates, and doors with exposed hardware | Long leaves extend across the door surface; historic versions may be forged or made from iron with hand-worked shapes. | Choose a hinge with enough leaf length and appropriate fasteners for the door’s weight. Check that the frame can carry the load before installation. | Keep the pivot area clean, inspect fasteners, and protect iron from persistent moisture to limit corrosion. |
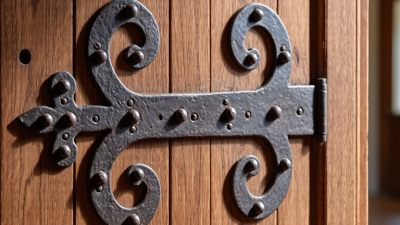
| H and HL hinge | Traditional ledged, batten, or lightweight interior doors | Surface-mounted leaves form an H shape; an HL hinge adds a longer, shaped arm. Decorative iron examples are common on older doors. | Useful when mortising is not appropriate or part of the original design. Position hinges to support the door evenly and use fasteners suited to the substrate. | Check for movement at the screws and clean the exposed leaves with a soft cloth. Avoid abrasive cleaning that could remove an aged finish. |
| Parliament hinge | Doors that need to swing clear of a deep reveal, trim, or nearby obstruction | Offset leaves and a projecting knuckle allow the door to open farther away from the frame than a typical butt hinge. | Measure the required projection and swing clearance before fitting. The extended geometry creates leverage, so secure fixing and sound surrounding wood are important. | Inspect the pivot and fixings periodically; address sag early to prevent stress on the frame and hinge leaves. |
| Rising butt hinge | Doors designed to lift slightly as they open and close under gravity | Mating surfaces are shaped to create a small vertical rise during opening; the door lowers as it closes. | Hinges are handed and must be fitted in the correct orientation. Confirm the door’s swing and floor clearance before installation; they are not a substitute for correcting a sagging door. | Keep the shaped bearing surfaces clean and use only a small amount of compatible lubricant if needed. |
| Butterfly hinge | Light doors, cupboards, and restoration work where visible surface hardware is appropriate | Decorative surface-mounted leaves often have a symmetrical, wing-like outline; patterns and proportions vary. | Best reserved for doors whose size and weight suit the hinge. Compare the leaf pattern and finish with surviving hardware before replacing missing pieces. | Dust gently and avoid polishing compounds that may damage patina or delicate surface detail. |
| Pivot hinge | Certain heavy or specialized doors designed to rotate on top and bottom pivots | The door turns around a vertical pivot axis rather than hanging from conventional side-mounted leaves. | Use only where the door and frame are designed for pivot support. Accurate alignment and a sound head and floor structure are essential; inspect the existing arrangement before altering it. | Keep pivot points free of grit and check alignment and wear. Follow the hinge’s construction when selecting lubricant or replacement parts. |
Restoration note: Antique hinge dimensions, materials, and load capacity vary by age and construction. Whenever possible, retain sound original hardware, document its position before removal, and verify door weight, clearances, and fixing condition before choosing a replacement.