Replacing a shower hinge looks simple until the glass shifts, the door drags, or water reaches the bathroom floor. This guide examines the 2026 Top Shower Door Hinge Replacement Options with practical, evidence-based considerations.
Tom Silva, a longtime renovation contractor and This Old House expert, often emphasizes, “Measure twice, replace once.” That advice matters here. Hinge spacing, glass thickness, door weight, swing direction, and finish must match precisely. A polished brass hinge may look attractive, but it cannot compensate for incorrect measurements or weakened mounting points.
Real-world replacement work reveals an uncomfortable detail. The hinge is rarely the only problem. Corroded screws, cracked seals, loose wall anchors, and slightly sagging glass can change the repair completely. I have seen doors that seemed ready for a quick part swap require careful alignment and fresh sealing. Small errors become obvious when a heavy glass panel closes unevenly.
This introduction compares compatible hinge types, corrosion-resistant materials, adjustment features, and installation concerns. It also considers when a replacement is reasonable and when professional glass service is safer. Some product descriptions sound convincing. They still need scrutiny.
The best Shower Door Hinge Replacement is not always the most expensive choice. It is the option that fits the existing glass, supports the door correctly, and survives daily moisture. That sounds obvious. Yet many failed repairs begin with assumptions rather than measurements.
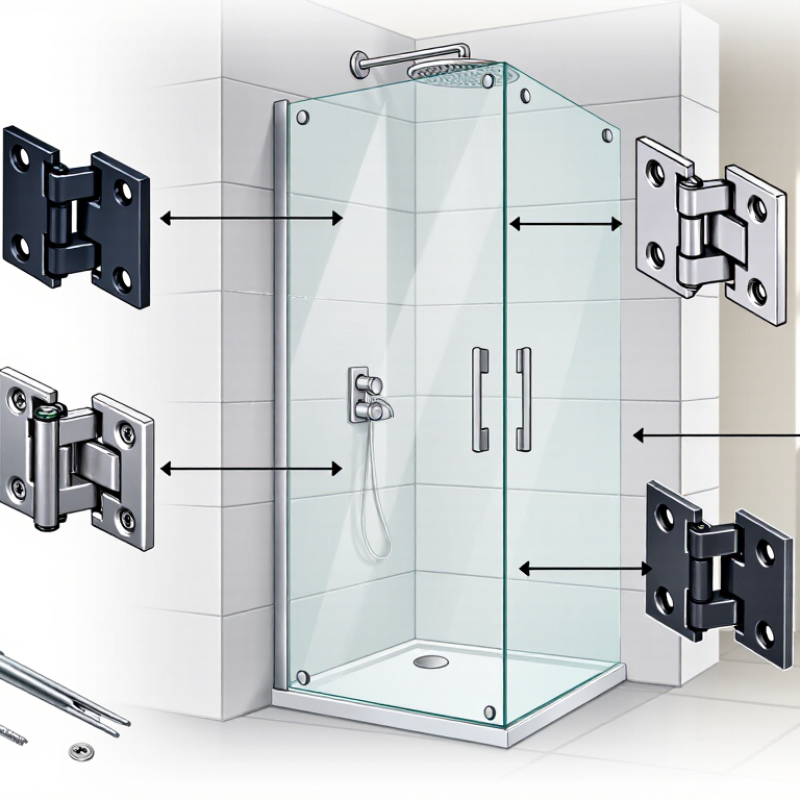
Shower door hinges come in several forms, and each suits a different installation. Pivot hinges support the door from the top and bottom, allowing a smooth swing. They work well for framed or semi-frameless enclosures. Continuous hinges run along the door edge. They distribute weight evenly and can reduce movement on taller glass panels. Wall-to-glass hinges connect a door directly to a tiled wall or solid surface. Glass-to-glass hinges join two panels at a corner, making them common in modern frameless showers. Offset hinges can help when nearby walls or handles limit door clearance.
Replacement applications depend on more than appearance. Measure the glass thickness, hinge cutout, hole spacing, swing direction, and mounting surface. Tempered glass cannot be drilled safely after installation. A qualified technician should confirm the opening before ordering hardware. I once underestimated a small wall slope. The replacement looked correct, but the door rubbed against the seal. That mistake showed why alignment matters as much as hinge strength. Stainless hardware usually suits wet rooms, but surface quality and maintenance still affect service life.
Tips: Support the door before removing any hinge. Check for loose glass, rust, cracked seals, or stripped screws. Replace worn gaskets during the same repair when possible. Test the door slowly after installation. It should close without scraping, dropping, or forcing the frame. Even careful measurements can miss hidden damage, so inspect the surrounding tile and glass closely.

How to Identify the Correct Shower Door Hinge
Choosing a replacement hinge starts with the door, not the old hardware. Measure the glass thickness, door width, hinge cutout, and opening direction. Most residential shower glass measures 8, 10, or 12 millimeters. Confirm the measurement with a caliper, not only a ruler. A small error can create uneven pressure and cracked glass.
Check the hinge material, mounting style, and weight rating. A glass-to-glass hinge differs from a wall-to-glass hinge. Their screw positions are not interchangeable. The 2024 Houzz U.S. Bathroom Trends Study reported a median major bathroom renovation spend of $35,000. That figure shows why protecting expensive finishes matters. A poorly matched hinge can damage tile, seals, and tempered glass. I have seen replacement work fail because the installer copied the hinge shape without checking the cutout. It looked correct. It was not.
Tips: Photograph both hinge sides before removal. Record every measurement. Check whether the door swings inward, outward, or both ways. Look for corrosion around screw holes. If the glass edge feels chipped, stop and consult a qualified glazier. Installation guides and ANSI-referenced hardware specifications are useful, but they do not replace an on-site inspection. My own process is not perfect; older doors sometimes hide previous repairs. Measure twice, and question unusual results.
| Replacement Option | Typical Door Configuration | Common Glass Thickness | Mounting Arrangement | Key Measurements to Verify | Material and Finish Considerations | Best Use Case | Identification Notes |
|---|---|---|---|---|---|---|---|
| Wall-to-Glass Hinge | One glass door attached directly to a wall or fixed jamb | 6 mm, 8 mm, or 10 mm (1/4 in, 5/16 in, or 3/8 in) |
One side mounts to the wall; the other side clamps the glass | Glass thickness, hinge body size, screw-hole spacing, wall-side plate dimensions, and door swing direction | Use corrosion-resistant stainless steel or a suitable solid brass construction; finish should match the existing hardware | Replacing a standard framed or frameless shower door hinge fixed to a tiled wall or vertical jamb | Usually has a flat wall plate on one side and a glass clamp with rubber or plastic gaskets on the other |
| Glass-to-Glass 90-Degree Hinge | Door meets a fixed glass panel at approximately 90 degrees | Commonly 8 mm or 10 mm (5/16 in or 3/8 in) |
Both hinge plates clamp through adjacent glass panels | Glass thickness, panel angle, cutout shape, hole-center spacing, hinge height, and door swing | Choose hardware rated for wet areas and use the original gasket thickness to prevent glass-to-metal contact | Corner shower enclosures with a door and side panel arranged at a right angle | Both sides normally have glass clamps; the two plates are positioned at a right angle when viewed from above |
| Glass-to-Glass 135-Degree Hinge | Door meets a fixed panel at an obtuse angle of approximately 135 degrees | Commonly 8 mm or 10 mm (5/16 in or 3/8 in) |
Both hinge plates clamp to angled glass panels | Panel angle, glass thickness, hinge cutout dimensions, hole spacing, door overlay, and swing direction | Use a hinge specifically designed for the enclosure angle; a 90-degree hinge is not a suitable substitute | Neo-angle or angled shower enclosures | The two mounting plates are visibly offset rather than forming a square 90-degree arrangement |
| Pivot Hinge or Pivot Set | Door rotates around top and bottom pivot points instead of a side-mounted hinge line | Often 6 mm, 8 mm, or 10 mm (1/4 in, 5/16 in, or 3/8 in) |
Top and bottom pivots may mount to a wall, header, floor, threshold, or fixed panel | Pivot location, top-to-bottom height, door width, glass thickness, pivot cutouts, and required swing clearance | Confirm whether the replacement is top-only, bottom-only, or a matched pivot pair; inspect bearings and bushings | Heavy or wide doors and enclosures designed with a central or offset pivot axis | Look for a pivot pin or spindle at the top or bottom corner rather than a conventional side hinge barrel |
| Continuous Hinge | Full-height door attached along most or all of one vertical edge | Varies by enclosure design; verify the original glass and profile dimensions | Long hinge leaf or channel attaches continuously to the door and a wall, jamb, or fixed panel | Overall hinge length, profile width, mounting-hole pattern, door thickness, and cut-to-length requirements | Check for stainless steel or anodized corrosion-resistant construction and compatible end caps | Doors requiring distributed support along the full edge or replacement of a long channel-style hinge | Recognized by its long, nearly full-height profile rather than two or three separate hinge bodies |
| Hinge for Framed Shower Door | Glass panel sits inside an aluminum or metal frame | Often uses thinner glass than frameless systems; measure the existing panel and frame | Mounts to the frame, with concealed, surface-mounted, or pin-style attachment depending on the design | Frame profile, hinge length, screw pattern, door overlap, frame rebate, and swing direction | Match the original frame system; frameless glass hinges are generally not direct replacements | Older or semi-framed enclosures where the hinge is integrated into the metal frame | The hinge usually engages with a metal channel or extrusion rather than clamping directly onto exposed glass |
| Self-Closing Shower Hinge | Frameless door that should return to a closed position | Commonly 8 mm or 10 mm (5/16 in or 3/8 in) |
May be wall-to-glass or glass-to-glass; closing mechanism is built into the hinge | Glass thickness, hinge angle, closing range, door weight, pivot alignment, and required hold-open position | Verify that the closing mechanism is designed for wet locations and that adjustment instructions are available | Doors that need controlled closing to reduce water escape and maintain alignment | Often has a larger hinge body or adjustment feature; do not replace it with a standard free-swing hinge without checking door behavior |
| Adjustable Frameless Hinge | Frameless door where alignment or closing tension may require fine adjustment | Typically 8 mm or 10 mm (5/16 in or 3/8 in) |
Wall-to-glass or glass-to-glass mounting with adjustable alignment or closing features | Mounting angle, glass thickness, hinge cutout, screw spacing, adjustment range, and maximum door dimensions | Confirm that adjustment screws and internal parts are suitable for repeated exposure to moisture | Replacement projects involving a sagging, misaligned, or difficult-to-close frameless door | May include visible set screws or adjustment points not found on a basic fixed hinge |
For 2026, shower-door hinge selection should begin with material, not appearance. In daily bathroom installations, 316 stainless steel performs well near coastal humidity and frequent cleaning. It offers stronger chloride resistance than 304 stainless steel. Solid brass remains useful for heavier doors, but its protective finish can weaken around abrasive cleaners. Zinc alloy costs less, yet it deserves closer inspection for pitting and thread wear.
The 2024 Houzz U.S. Bathroom Trends Study reported that 78% of renovating homeowners upgraded shower areas. That demand makes reliable hardware more important. Look for hinges tested with tempered safety glass, accurate screw alignment, and adjustable closing tension. ASTM C1048 covers heat-treated flat glass, while ANSI Z97.1 addresses glazing safety performance. These standards do not guarantee hinge quality. They still help verify the complete door system. I would not trust decorative coating claims without corrosion-test details. That is an easy mistake.
Tips: Measure glass thickness and door weight before ordering. Confirm the hinge’s rated load, hole pattern, and opening angle. Choose concealed seals where water collects. Inspect screws after installation. A tiny alignment error can create a heavy, uneven swing. The U.S. Environmental Protection Agency’s WaterSense criteria limit showerheads to 2.0 gallons per minute, but water efficiency does not prevent hinge corrosion. Regular drying still matters.
Replacing a shower door hinge starts with accurate identification. Measure the hinge spacing, glass thickness, swing direction, and screw-hole pattern. Choose a replacement with matching dimensions and suitable load capacity. Do not drill or modify tempered glass. It can shatter without warning.
Clear the shower area and place a padded blanket on the floor. Have another person support the glass door. Remove the hinge covers, then loosen the screws gradually. Keep the door supported at all times. After removal, inspect the glass edges, rubber gaskets, screws, and mounting surface. Replace damaged gaskets instead of reusing flattened ones. Clean soap residue and rust from the contact areas. A clean surface improves alignment.
Position the new hinge against the glass and install the gaskets on both sides. Tighten each screw by hand first. Keep the hinge level, then tighten the screws evenly with the correct tool. Avoid excessive force. Open and close the door slowly, checking for rubbing, uneven gaps, or movement. In practice, alignment often needs one extra adjustment. I would rather recheck it than trust a door that feels “almost right.” Wait before applying sealant unless the hinge instructions require it.
Tips: Support the door before removing one screw. Photograph the original hinge position. Wear cut-resistant gloves and eye protection. Stop if the glass has chips, cracks, or loose hardware. A qualified glass-door technician should inspect serious damage.
Typical planning estimates for replacing common shower door hinge configurations. Actual compatibility depends on door thickness, glass hole spacing, swing direction, and wall or glass mounting requirements.
The most suitable replacement is usually selected by matching the existing mounting configuration: wall-to-glass hinges for fixed wall installation, 90-degree glass-to-glass hinges for corner enclosures, 180-degree glass-to-glass hinges for inline panels, and pivot-style hardware for doors designed around a top-and-bottom pivot system. Always support the glass while removing the old hinge and verify the door thickness before installation.
After replacing a shower door hinge, safety checks should begin before regular use. Confirm that every screw sits evenly and remains tight without stressing the glass. Overtightening can create pressure points around the hinge cutout. Check the tempered glass edges for chips, cracks, or sharp contact marks. Any damage deserves professional assessment.
Open and close the door slowly several times. It should move smoothly without scraping the frame, wall, or floor. Inspect the seal along the closing edge. A narrow, even gap helps prevent water from reaching nearby flooring. Place a dry towel outside the shower and test for leaks during a normal rinse. Small drips often expose alignment problems that look harmless.
Clean the hinge with a soft cloth and mild soap. Avoid abrasive pads and harsh chemicals that may dull the finish or weaken seals. Check the fasteners monthly, especially during the first three months. Some hinges need compatible lubricant, while others are designed to operate dry. I have seen people add oil too quickly, which later trapped dust near the pivot. That was not helpful. If the door begins sagging, binding, or making a cracking sound, stop using it until the hinge and glass are inspected. A second check is worthwhile, even when the installation seemed perfect.